Site Details
Home
News
Site
Map
FAQs
Site
History
Email
The Safety Zone
About
The Section
The
1974 Act
Managing
Safety
Risk Assessment
Appendices
Award Program
Closure
Criteria
Commentary
And Stats
The
Winners
Articles
About Me
Webmaster
Biography
Bin
Head Blog
The Cubbyhole
MX5 MK2.5
Multiple Sclerosis
Italy2006
GemStone IV
Job Evaluation
Italian gcse 2008
1/2 Marathon Training
New York 2008
Italian Tour 2009
V Festival 2011
Bucket List
New Zealand 2012
Standard Medium Large TextOnly
Assess risk
personal - MX5 cleaning
Believe it or not, I used to use washing-up liquid and any old rag on my last car. The use of 'decent' products was something totally alien to me. Then with the purchase of my 5 I was introduced to Autoglym. Absolutely fantastic products. Having purchased my first £100.00 worth of cleaning products, I needed to know how to use them. This is the guide I now follow. (PDF Format)
Cleaning the MX5 (PDF) - Information taken from: http://www.autoglym.co.uk/
CLEANING PROBLEMS ENCOUNTERED
- Removing stubborn adhesive from paintwork
I removed my number plate and a number of decals only to find that the adhesive was a pig to remove. I actually used Autoglym intensive tar remover. I soaked the tip of a soft lint free cloth in this chemical and applied a little pressure. The adhesive came off. For the more stubborn deposits of adhesive I soaked the adhesive with the chemical and left it for 5 minutes. A little bit of pressure got it off. (I did have to do this a couple of times for the worst areas.) I then wiped off the adhesive and then washed it off with just water containing a touch of Autoglym bodywork shampoo and dried it completely with a lint free cloth.
- Know your chrome from your plastic
I cleaned my 'chrome' kick plates with autoglym polish and totally buggered them up. Instead of looking shiney, they look dull and lifeless. The reason? I thought they were chrome. They are actually a chrome effect plastic material. The moral is, ensure that you are certain about the material you are cleaning before cleaning it. All that glitters is not necessarily chrome.
- Cotton buds and tooth brushes
My own antiquated vacuum cleaner doesn't seem to have attachments small enough to get into the nooks and crannies of my car's interior. I have found that using a combination of cotton buds and my old toothbrushes has helped to deal with dust and crumbs lurking in awkward crevices. I do not use the toothbrushes on paintwork though.
- Fast winter clean
It's winter. It's freezing. The car is disgustingly dirty and you don't want to freeze your butt off outside. What do you do? Well I just filled a bucket with warm water (to keep my didgets nice and toasty) and a 'touch' of autoglym conditioning shampoo. Using a sponge and working from the top downwards I wiped the dirt off the car. I used single strokes, only dealing with the bottom of the car once to top was done, to minimise scratches. When this was done I used the sponge to give the wheels a quick once over. And hey presto! One outwardly clean car in about 10 minutes maximum. Ok so it's not top notch cleaning and the car cleaning anoraks are going to go on and on about the need to remove the dirt first with plain water to prevent scratching. But you know, if there's a resulting scratch on my car after doing that, I'll be blowed if I can see it!
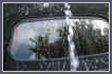
- Cleaning the rear window
I actually found access to the rear window in the car very difficult. I have style bars fitted so reaching between and around them is not easy. But it was clear that the window needed cleaning. On the inside there are streaks that spoil the rear of the car. On the outside there are deposits around the edge from previous products used on the body of the car. I tried autoglym interior shampoo but to be honest, I could not remove the streaks, even using a lint free cloth. So I used simple warm water - nothing added - to clean the window inside and out. I actually used a lint free polisher to apply the water and a chamois leather to remove dry without streaks. I applied a bit of elbow grease when using the cloth to remove the built up deposits on the outside edges of the window. I didn't want to use a cloth that was abrasive for obvious reasons. This seems to have worked...it's not perfect, but it's a lot better than it was before.

^ top of page